¶ GIT at the GIM
You will find that our website and most of our institute content is handled via Git. Git is a powerful version control system that helps you track changes in your code, collaborate with others, and manage your projects efficiently. Whether you are working on a solo project or contributing to a team effort, Git is an essential tool, not only for the GIM, but as you develop your career as a geoscientist 👩🏽🔬 🧑🏻🔬
¶ What is git?
Git is a distributed version control system (VCS) that helps track changes in your code and manage your project's history. It's a command-line tool that allows multiple developers to work on the same codebase simultaneously without overwriting each other’s work. This system can be used in many other softwares such as GitHub and GitLab.
¶ What is GitLab ?
GitLab is a web-based DevOps lifecycle tool that provides a Git repository manager, among many other features. It integrates with Git to offer a comprehensive platform for software development, including version control, CI/CD pipelines, project management, and more. RWTH Aachen provides a GitLab for insitutes and university matters. GitLab serves as the central place to host all your Git repositories, making it easy to access and manage projects from anywhere.
¶ Getting started on RWTH GitLab
To get started, make sure you are already registered to RWTH GitLab Registration
We are currently using git-ce.rwth-aachen.de - which should be used as the "Community Edition" license and not for educational purposes.
For more information on RWTH GitLab visit RWTH GitLab General Information
Once you are logged in you can search our project name: gim
There you can request access by clicking on ..more actions or just ask one of the maintainers to add you using your username.
¶ Getting started with GIT
¶ Cloning an existing repository
You can create a new folder in your local computer to download the content of a repository. This can be done via the terminal. Don't worry ! It is not scary and much easier to do than downloading all the files  .
.
You can open your terminal and navigate to that folder using cd commands.
cd "Path-to-your-folder"
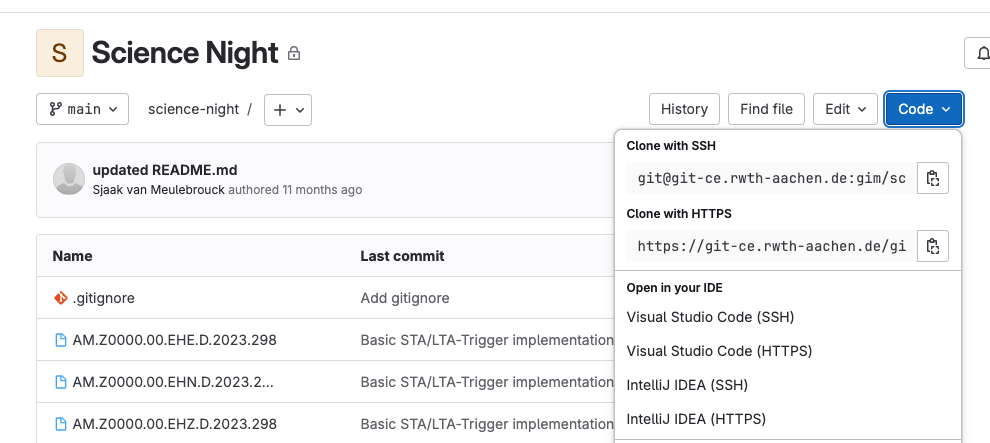
There you can clone the repository using your terminal. There are different ways you can clone a repository to your local computer by clicking on the blue button on the main repo directory that says Code. There you can see the option:
clone via HTTPS: Which is suitable for occasional use and for a simple setup that works well with firewalls/proxies.clone via SSH: The more secure option for frequent use but does need some initial setup.
Choosing between SSH and HTTPS depends on your use case. For frequent interactions with GitLab repositories, SSH is typically more convenient and secure. For occasional access or situations where setting up SSH keys is not feasible, HTTPS is a straightforward alternative.
Below is a screenshot to show where the Code button is and the cloning options for the Science Night repository.
¶ Steps to clone via HTTPS:
- If you choose to clone via HTTPS, click on the clipboard icon and copy the URL of the git repository
- Clone the repository by typing
git clonein your terminal and paste the URL from the repository you just copied and press enter. So in the following example, replace https://gitlab.com/yourusername/GIM.git with the actual URL of the repository you want to clone.
git clone https://gitlab.com/yourusername/GIM.git
- Navigate to the Cloned repository:
Usually named after the repository name. In this example it is called GIM. You navigate again using the "cd" and "./" commands.
cd GIM
¶ Steps to set up SSH Cloning:
Before being able to clone with SSH, you first need to set up an SSH key. This can be done in your terminal with the following steps.
- Generate an SSH Key Pair
ssh-keygen -t ed25519 -C "<comment>""
Follow the prompts to save the key and enter a passphrase if desired. This saves two files to the folder you were on your directory when creating the key; a private and a public key file. 🚨 Please only use the public key ("name-of-your-key.pub") 🚨 . You can open this file with any text editor or just double click to open with a default program.
- Add SSH Key to GitLab
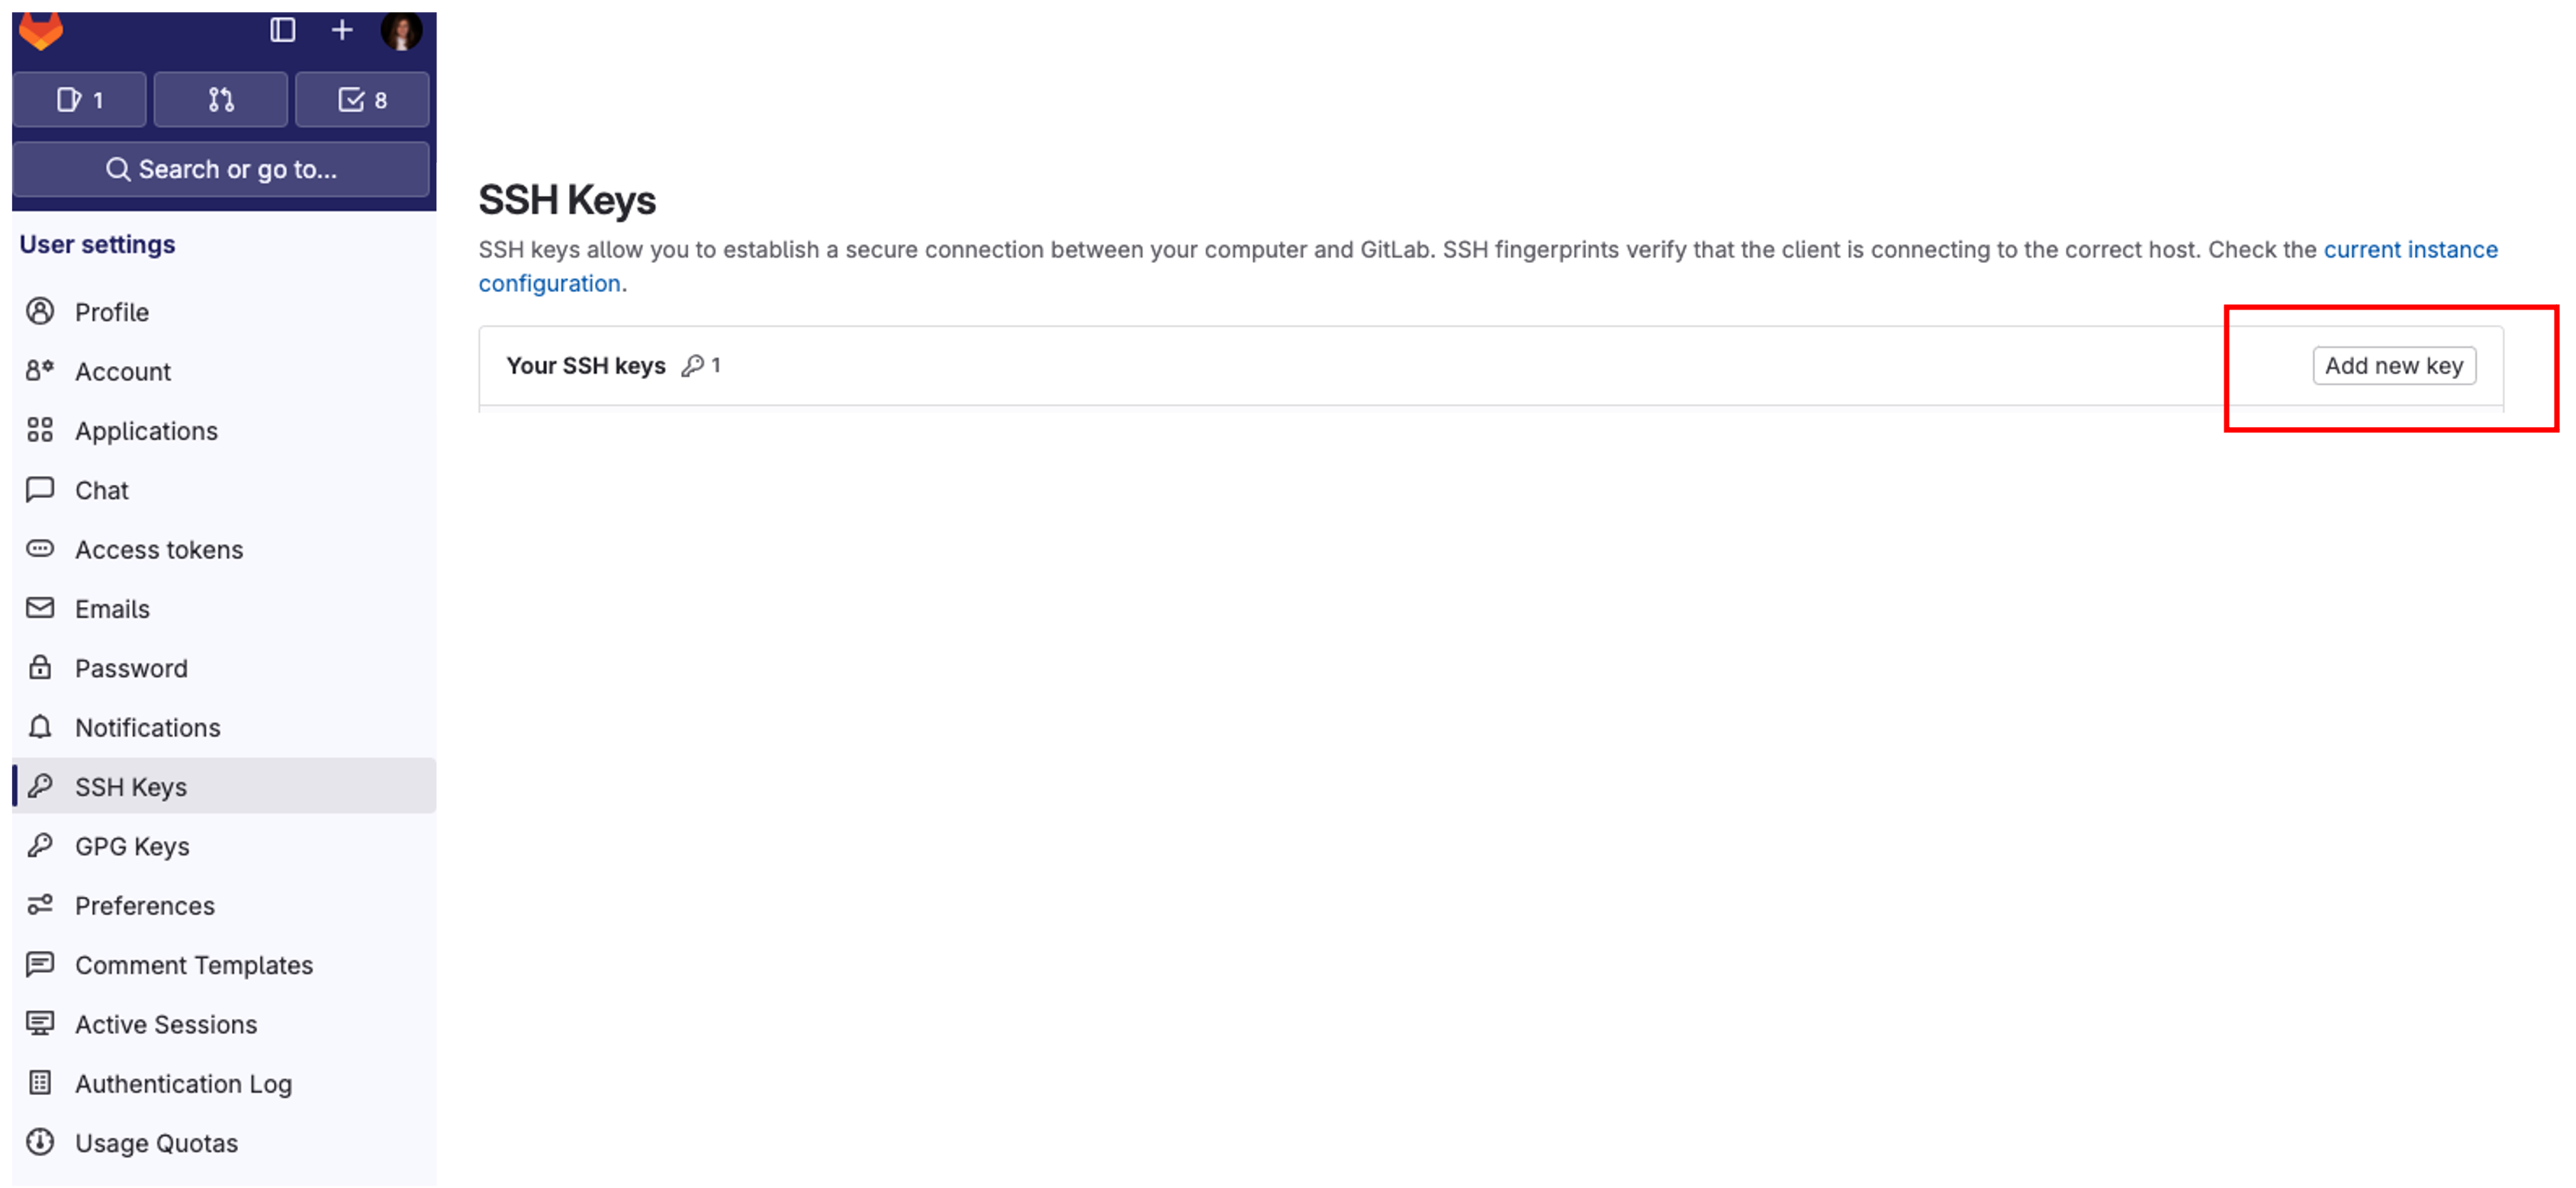
Copy the public key to your clipboard (it should be a long key of numbers and letters that start with ssh).
And then log in to GitLab, and under your User go to Preferences > SSH Keys, and select Add new key. Paste the key and give it a certain title and add the key.
- Clone the repository using SSH:
git clone git@gitlab.com:username/repository-name.git
If you run into issues, please visit the GitLab website on creating an SSH key for more information.
¶ Creating a branch and making changes
Once you already have the files on your local computer ( ), you can make changes to your files there and then "upload" them (along with a history of all of the changes you made) using Git. So 🚨 before making new changes 🚨, we suggest to first create a branch.
¶ Creating a branch
You can create a new branch. In Git, a branch is like a separate workspace within your project where you can make changes without affecting the main codebase.
Use the git checkout -b command followed by the name of your new branch. For example, to create a branch named new feature:
git checkout -b new-feature
¶ Commiting changes
After you make all of your changes you can add the files that you changes to your first  commit . You can add all the files you changed by using
 git add . or individual files using git add "the-file". Then you commit and add a quick comment on what you changed using -m "The quick comment" . The process for adding all of your changes should look like this:
git add .
git commit -m "Add new feature"
Git will automatically print a summary of modifications and which new files were added. You can also use git status command to see this report at any given time.
¶ Pushing them to the remote repository
Now you can push your changes to your branch
git push origin new-feature
The next step is to go to GitLab and create a Merge request to review and merge your changes into the main branch.
You may get some messages about the permissions when pushing to certain repositories. Only members with a developer role can push directly to the main branch of a repository. For more insights, on the current roles, please contact Florian Wagner. For more information on role permissions visit the GitLab permission summary
¶ Creating a new project
You can easily create a new project under the group page on GitLab
- Click the
New projectbutton - Select the Blank project option
- Fill in the information on the project type and assign a descriptive name
- This will create a new repository that can be cloned to your local computer where you can add existing files following the steps stated above.